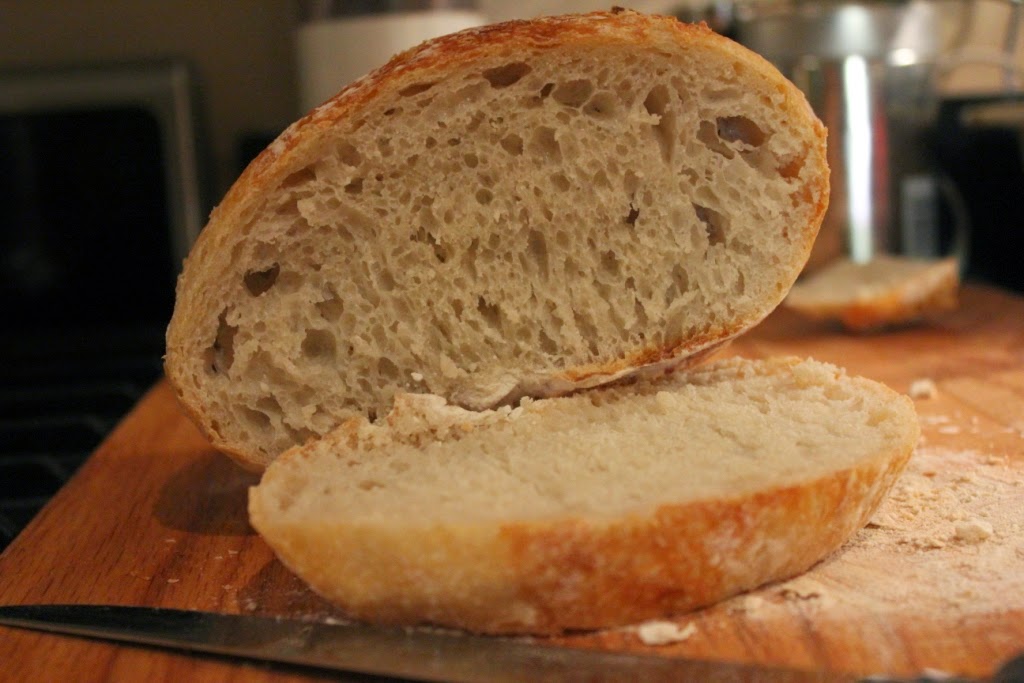
A friend gave me a recipe for a 5 minute focaccia, which started me down a long and delicious path. I tried the base recipe, played with it a little and decided to blog a series of recipes on the versatility of this bread. Why? Because it's darned delicious! Also, for those who are nervous to make bread this is likely the recipe that would give them confidence to experiment with yeasts, kneading (or not) and simply trying something new. The reputed originator is Jim Lahey of Sullivan Street Bakery, his recipe requires a bit more effort but wow, does it look good!
I adjusted this recipe to suit my 3.5 Quart Dutch Oven. There are literally hundreds of recipe variations which give amounts for 5 and 6 Quart ovens.
Important to NOTE: You do not need a Dutch Oven, simply a pan with a cover that can take 450F temperature. Or a pan that can take the heat and aluminum foil.
Also, this bread takes 12 hours to rise, at least.
Things you Knead (Need - See what I did there??) (Otherwise Known as Ingredients and Supplies)
2 cups All Purpose Flour, plus some for dusting3/8 tsp Quick Rise Yeast
1&1/4 tsp Kosher Salt
1&1/3-1&1/2 cups Water, Cool to Room Temperature
Parchment Paper
Plastic Wrap
Dutch Oven (3.5 qt) or a pan that can take the heat
Something that serves as a cover
Large Bowl for rising dough
Spoons, measuring cups - You know the drill
Things you Do (Otherwise Known as Directions)
Dump 2 cups of flour in the bowl. Add the yeast and salt and mix together. I use a small whisk.Add the water. I start by dumping 1&1/3 cups in and using a wooden spoon or spatula to mix. Please DO NOT overmix - the less you fuss the better. If you find that the flour is not incorporated, add remaining water, a Tbsp at a time until no "loose" flour is left.
Cover with plastic wrap and set aside.
12-18 hours later...
Preheat Oven to 450F. When your oven reaches the temp. Carefully put your pan (with cover or foil on) in the oven and leave for 30 minutes. It's creating a steam oven within an oven!Meanwhile...
Take a piece of parchment and lay out on the countertop. Dust the parchment paper with flour and coat your hands. The dough will be uber-sticky! Unwrap the dough bowl, take a scraper (or a really pointy hand) and dump on the paper. Keep plastic wrap.
Using your well flour-dusted hands mold the dough into the shape of the pan (I use a round Dutch Oven). You will end up with loose flour on the top - no worries, we'll deal with that shortly.
Back to regularly scheduled programming....
Place the plastic wrap loosely on the dough and let it rest until the pan has heated for 30 minutes.
Ding! The 30 minute timer has gone off.
Take a brush and gently dust off the excess flour on the parchment paper. Even brush most off the top. There is some flour that will stay stuck and that is absolutely ok. Trim parchment paper to about 2 inches surrounding the dough if you wish.
WITH OVEN MITTS, take out the pan, take off the cover and CAREFULLY drop the dough (parchment paper and all) into the pan. Put cover on (or in my case crimp foil on) and place in oven for 30 minutes.
30 minutes later...
Take off cover and bake for 15 minutes more.
When done, carefully remove from oven and lift the bread out and place on cooling rack.
Let cool completely (yeah right) and then slice, use as bowl, rip off chunks - whatever tickles your fancy.
Wrapping it in plastic wrap will keep it for about a week easily.
Cheers and happy non-kneading,
Lori


0 comments :
Post a Comment
I really appreciate you taking time to comment. I read them all.
Thanks ever so much!
Lori