
I've had varying levels of babka obsession since the infamous Seinfeld episode. This past Christmas I resolved to teach myself the art of baking a babka - the only hitch is that I had never really tasted babka so I was going out on a limb.
Thankfully a January visit to NYC yielded 2 opportunities to enjoy this amazing sweetened bread - Kossar's in the Lower East Side and Zucker Bakery in the East Village. Emboldened by these experiences I went home and tried my hand at it. With some adaptations... You'll see.
Note - this is a multi-day recipe, no you will not be actively working on it but the dough needs at least (imo) a 24 hour rest to get the flavours to percolate.
First change - No Knead Brioche. I tried a lovely but very time-consuming method for brioche and I resolved to find a recipe that was easier, much easier. Thankfully Bigger Bolder Baking (Gemma) had the answer.
Second change - I made mini loaves so my friends could taste test the results. You could definitely use this recipe to make a full loaf and I will adjust directions for that as we go along.
Third change - I used a syrup instead of a crumb top.
As with most of my blogged recipes, this is photo heavy - I am a visual learner.
Things you Need (also known as Ingredients)
Brioche
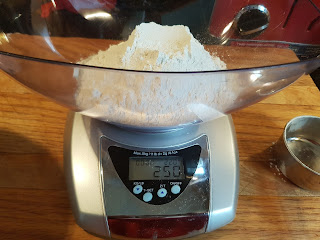
2 cups (250g) all purpose
flour / plain flour
Filling
3 & 1/2 ounces dark
chocolate
1/4 tsp cinnamon (optional)
1 tsp espresso powder (optional)
Syrup
6 tablespoons granulated
sugar
1/3 cup water
Brioche
2 cups (250g) all purpose
flour / plain flour
7 Tbsp (100g) unsalted butter,
melted
1/3 cup milk at room
temperature
2 eggs
2 & 1/2 Tbsp (50g)
honey (you can also use sugar or maple syrup)
1 tsp salt
1 tsp instant dried yeast
Filling
3 & 1/2 ounces dark
chocolate
1/3 cup unsalted butter
1/3 cup powdered sugar
1/4 cup cocoa powder
1/4 tsp cinnamon (optional)
1 tsp espresso powder (optional)
1/4 tsp cinnamon (optional)
1 tsp espresso powder (optional)
Syrup
6 tablespoons granulated
sugar
1/3 cup water
Things You Do (also known as Directions)
Day One


2. Combine honey, milk, salt and melted butter and whisk together well. Make sure it is not too warm as you are adding eggs.


3. Add the eggs as whisk well.
4. Add the wet ingredients to the dry and mix for 30 seconds until your dough looks smooth and no lumps - I use a fair bit of strength here, it gets a little tough to stir.


5. Cover your bowl and let the dough rest for two hours at room temperature.

6. After the 2 hours, use a spatula to knock the air out of the dough in the dough.


7. Cover with plastic wrap (again) and place in the refrigerator for a minimum 12 hours, but I recommend 24 hours. It can stay in the fridge for up to 48 hours. 
DO NOT TRY TO SPEED UP THIS STEP (yes, in all caps)
Day Two
Note - it is sticky so flour your workspace, rolling pin and hands well.
While the dough is coming to temp:
Filling


Brioche

4. Remove your brioche from the fridge. Sprinkle the top of the dough with flour as well to keep your pin from sticking. Remember, the dough won’t roll out if it’s stuck to the counter, so make sure you add more as needed. Roll the dough out into a large rectangle, about 18” by 12”. Run your hand over the dough to feel that it is the same thickness all over and try to keep it even.


5. Once your dough is rolled out, spread the filling over top of it using an offset spatula. Starting at the end closest to you (the longest side), roll the dough away from you into a log. Place a piece of parchment on a cookie sheet and transfer the log to it, seam side down. Place it in the freezer for about 5 minutes.


6. Remove dough from the freezer and slice it clean in half down the middle (the long way) so you have two long pieces with the filling exposed.


Note:

7. Put the braided brioche into your loaf pan(s) - it will be longer than your pan, so put it in an ’S’ shape, tucking the end in.


At this point, the loaves can be well-wrapped and frozen for up to 4 weeks. Remove to the fridge to defrost overnight, then proceed with next steps.
8. Cover pans with plastic wrap and leave in a warm place for about 1.5-2 hours to rise. Make the syrup during this time.


Syrup

Baking


11. Once out of the oven, brush the syrup over the top – a generous amount. There will be syrup left over.


12. Let cool completely.
And there you have it! Chocolate Babka!!
Cheers,
Lori


Note - it is sticky so flour your workspace, rolling pin and hands well.
While the dough is coming to temp:


At this point, the loaves can be well-wrapped and frozen for up to 4 weeks. Remove to the fridge to defrost overnight, then proceed with next steps.


12. Let cool completely.
And there you have it! Chocolate Babka!!
Cheers,
Lori


0 comments :
Post a Comment
I really appreciate you taking time to comment. I read them all.
Thanks ever so much!
Lori