Peanut Butter is the only thing that sustained me during the school lunches of my youth. My love of this creamy, dreamy foodstuff will likely be written in my biography some day. Lurid details of open faced PB sandwiches and eating it with a tablespoon.
Oh Peanut Butter, you saucy minx....
Wait, what? Cake - Right. My big (*cough* - older) brother Glen would traditionally ask for a Peanut Butter Birthday Cake with Peanut Butter icing. It was a dense, delicious concoction that I personally looked forward to as well. I went looking for Irene's recipe and then decided to... change it up a little, Lori Style.
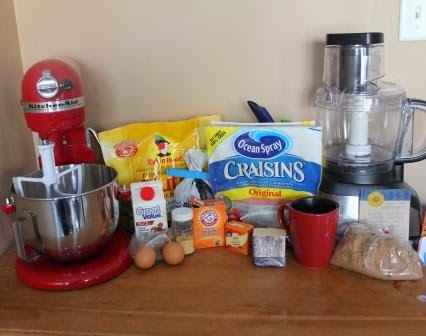
Things You'll Need (Otherwise Known as Ingredients and Supplies)
Cake
Wet Ingredients1 Cup Smooth Peanut Butter (I used a natural one)
1/2 Cup of Butter, softened (I used salted butter, if you use unsalted definitely add a 1/2 tsp of salt)
1 1/4 Cups White Sugar
1 Cup Buttermilk *
2 Eggs, beaten
2 Tsp Vanilla

*No Buttermilk - No Problem! Take a Tbsp of Lemon juice and put in the measuring cup, fill with milk to the 1 Cup mark. Mix together - Buttermilk!

Dry Ingredients
2 1/4 Cups Flour
1 1/4 Tsp Baking Soda
1 Tsp Baking Powder
Pinch of Salt (optional)
Cream Cheese Filling
4 oz Cream Cheese, softened1/2 Cup Smooth Peanut Butter
1/8 Cup Whipping Cream (maybe a wee bit less)
1/2 Tsp Vanilla
1 1/2 Cups Icing (Powdered) Sugar
Ganache
7 Oz of Semi Sweet Chocolate4-5 Oz of Whipping Cream
Baking Items
2 - 8" Round Cake pansParchment Paper
Non-Stick Spray or a small bit of butter
Pan of water (to put in oven)
Small sauce pan
Mixing stuff
Things You'll Do (Otherwise known as Directions)
I'm going to take a moment and talk about my experience with the oven temperature. I actually baked 4 cakes. 2 at 350F for 33 minutes and 2 at 325F for 38 minutes. I preferred the 325F cakes. My advice is to keep watching the cakes after about 30 minutes and judge yourself accordingly. You know your oven.Cake
Preheat oven to 325F. Take a baking pan, fill with water and put it on the rack below the baking racks. Make sure your cakes bake on the middle rack of the oven. This is a key feature in most of my cake baking endeavours, it amps up the moistness of the cake.In a mixer, cream together the peanut butter and butter. Add sugar and continue to mix until completely smooth. Add beaten eggs, vanilla, and buttermilk. I beat this together until it was smooth and almost airy. Lots of volume.

In a separate bowl, sift together 3 (three) times - the flour, baking powder and baking soda. I don't know why 3 is the magic number - it just is. Add the pinch of salt (if you wish).

Add the sifted ingredients, 1 cup at a time, to the wet ingredients and mix after each addition. Don't beat too much as it makes the batter kind of... tough - it's a stiff batter anyway.

Once just mixed, spread evenly between two greased and parchment lined cake pans. Yes, the batter is stiff - don't worry. Also take the time to smooth the top of the batter - it aesthetically makes a difference and makes for an easier application of frosting.

Pop in oven. At 325F, I removed the cakes at 38 minutes. Use the tried and true cake test and ensure the "pointy object" comes out clean.
Let the cakes cool completely in the pan, then turn the cakes out onto a cooling rack while you do the filling and ganache.
Filling
Cream together the softened cream cheese and peanut butter until smooth and completely combined.Add 1/2 of the whipping cream and vanilla. Mix well.
Add the icing sugar in 1/2 cup increments until completely combined.
If it looks too stiff, add the remaining cream a Tbsp at a time until you like the consistency.

Place 1st cake on a plate and then smooth the filling on the top of cake. You can cut off the top of the cake to have a flat surface. I'm lazy and didn't.

Lay 2nd cake on top of filling.

Ganache
There are a million recipes to make ganache, but here is the link that changed my life (from the kitchn). It makes the process simple and versatile. Follow the logic and ganache-superiority is yours for the taking!In a heat proof bowl cut up 7oz of semi-sweet chocolate.

In a small saucepan, heat 5(ish) oz of whipping cream. No need to boil it, just heat it.
Pour about 2/3rds of the heated cream over the chopped chocolate and stir. Keep adding heated cream, bit by bit until you get the consistency you need. Mine was not a thick glaze nor a pourable one so I wasn't quite 1:1.

Once smooth and no chocolate chunks exist, spread over cake and decorate as you wish.


Whew!!! And we're done.
This cake is dense, rich and delicious. A small piece is enough... Well... Maybe.

Eat, eat and be merry.
Cheers,
Lori